使用 GraphQL 创建 Express 服务器
注意
我最初用西班牙语写了这篇文章。所以有些资源和代码引用是西班牙语的。
前提条件
为了运行并更好地理解这些步骤,需要具备:
- 已安装
nodejs(因此npm也需要)。
项目创建
使用 Express 和 GraphQL 创建服务器相对简单。首先,导航到要创建服务器的文件夹。在文件夹内打开控制台,创建一个目录并进入它。在本例中,文件夹将被命名为 express-gql。
$ mkdir express-gql
$ cd express-gql
使用 npm init 初始化项目。填写所需的选项。
$ npm init然后完成选项。如果不输入任何内容,将自动选择默认值。可以用你的名字替换 <author-name>。
This utility will walk you through creating a package.json file.
It only covers the most common items, and tries to guess sensible defaults.

See `npm help json` for definitive documentation on these fields
and exactly what they do.

Use `npm install <pkg>` afterwards to install a package and
save it as a dependency in the package.json file.

Press ^C at any time to quit.
package name: (express-gql)
version: (1.0.0)
description: A server with graphql
entry point: (index.js)
test command:
git repository:
keywords:
author: <author-name>
license: (ISC) MIT
About to write to /<...path-to-folder>/express-gql/package.json:

{
  "name": "express-gql",
  "version": "1.0.0",
  "description": "A server with graphql",
  "main": "index.js",
  "scripts": {
    "test": "echo \"Error: no test specified\" && exit 1"
  },
  "author": "<author-name>",
  "license": "MIT"
}


Is this OK? (yes) yes
之后,使用以下命令安装所需的依赖项:
$ npm install --save express graphql express-graphql安装依赖项后,创建我们将使用的主文件,命名为 index.js。
在首选的文本编辑器中打开 index.js 文件。
现在我们将编写并解释代码。
首先,导入需要的包。
const express = require('express');
const expressGraphQL = require('express-graphql');
const { buildSchema } = require('graphql');
接下来,创建一个模式。GraphQL 中的模式是我们定义可以执行什么类型的操作(例如 Query、Mutation)、其名称以及它返回的数据类型的地方。此外,我们可以定义新的数据类型。
Query 用于获取信息,Mutation 用于修改信息。
让我们创建三个 Query,一个 Mutation,以及一个新的数据类型。
// graphql schema
const schema = buildSchema(`
  type Query {
    mensaje: String
    persona(id: Int!): Persona
    personas(edad: Int!): [Persona]
  },
  type Mutation {
    actualizarEdad(id: Int!, edad: Int!): Persona
  },
  type Persona {
    id: Int,
    nombre: String,
    apellido: String,
    edad: Int,
    hobbies: [String]
  }
`);
我们定义了三个 Query:mensaje、persona 和 personas。persona 和 personas 都需要参数。我们在数据类型后使用 ! 来指定它是必需的参数。persona 返回一个 Persona 类型的对象,personas 返回一个 Persona 对象数组。
我们还定义了一个名为 actualizarEdad 的 mutation,它接收两个 Int 类型的参数并返回一个 Persona 对象。
最后,我们定义了一个名为 Persona 的新数据类型,它包含 id、nombre、apellido、edad 和 hobbies 属性。hobbies 被定义为 [String],所以它可以包含一个字符串数组。
由于我们在本指南中没有使用数据库,让我们创建一个 .json 文件来存储我们将操作的信息。创建一个名为 personas.json 的新文件。
将以下信息添加到文件中:
[
  {
    "id": 1,
    "nombre": "Carlos",
    "apellido": "Rodriguez",
    "edad": 21,
    "hobbies": ["programar", "cantar", "cine", "dibujar"]
  },
  {
    "id": 2,
    "nombre": "Jesus",
    "apellido": "Medina",
    "edad": 23,
    "hobbies": ["cocinar", "música", "cine", "salir"]
  },
  {
    "id": 3,
    "nombre": "Karla",
    "apellido": "Araúz",
    "edad": 18,
    "hobbies": ["dibujar", "cocinar", "salir"]
  },
  {
    "id": 4,
    "nombre": "Marcos",
    "apellido": "Navarro",
    "edad": 25,
    "hobbies": ["programar", "musica"]
  },
  {
    "id": 5,
    "nombre": "Jose",
    "apellido": "Mendoza",
    "edad": 18,
    "hobbies": ["editar videos", "cantar", "tocar guitarra"]
  }
]
现在将文件引入我们的 index.js。代码如下所示:
const express = require('express');
const expressGraphQL = require('express-graphql');
const { buildSchema } = require('graphql');
// new line
let personas = require('./personas.json');
现在告诉 GraphQL API 如何获取模式中定义的信息。为此,我们将创建函数来操作我们之前引入的 personas 对象数组。需要注意的是,在运行时对数据所做的修改不会修改实际的 personas.json 文件,因为我们使用临时变量来引入文件。
以下是带有将应用于我们的模式的函数的代码。当进行 GraphQL 查询时,会收到一个参数对象。这些参数是与查询一起发送的参数。我将使用 对象解构 在创建函数时直接使用属性。更多信息请参见此处。
// for queries
const getMensaje = () => 'Hola desde el servidor con graphql';
const getPersona = ({ id }) =>
  personas.filter(persona => persona.id === id)[0] || [];
const getPersonas = ({ edad }) =>
  personas.filter(persona => persona.edad === edad);
// for mutation
const actualizarEdad = ({ id, edad }) => {
  personas.map(persona => {
    if (persona.id === id) {
      persona.edad = edad;
    }
    return persona;
  });
  return getPersona({ id });
};
express-graphql 接收一个具有名为 rootValue 的属性的对象。rootValue 接受一个对象,该对象具有与模式中定义的相同的名称以及如何处理这些查询。
让我们创建一个名为 root 的对象,并将创建的函数传递给它:
const root = {
  mensaje: getMensaje,
  persona: getPersona,
  personas: getPersonas,
  actualizarEdad: actualizarEdad
};
最后,让我们创建带有由 expressGraphQL 处理的 /graphql 端点的 Express 服务器:
// create express server with graphql at /graphql endpoint
const app = express();
const port = 4000;
app.use('/graphql', expressGraphQL({
  schema: schema,
  rootValue: root,
  graphiql: true
}));

app.listen(port, () => console.log(`Servidor graphql corriendo en http://localhost:${port}/graphql`));
index.js 文件应如下所示:
const express = require('express');
const expressGraphQL = require('express-graphql');
const { buildSchema } = require('graphql');
let personas = require('./personas.json');

// graphql schema
const schema = buildSchema(`
  type Query {
    mensaje: String
    persona(id: Int!): Persona
    personas(edad: Int!): [Persona]
  },
  type Mutation {
    actualizarEdad(id: Int!, edad: Int!): Persona
  },
  type Persona {
    id: Int,
    nombre: String,
    apellido: String,
    edad: Int,
    hobbies: [String]
  }
`);

// for queries
const getMensaje = () => 'Hola desde el servidor con graphql';
const getPersona = ({ id }) =>
  personas.filter(persona => persona.id === id)[0] || [];
const getPersonas = ({ edad }) =>
  personas.filter(persona => persona.edad === edad);
// for mutation
const actualizarEdad = ({ id, edad }) => {
  personas.map(persona => {
    if (persona.id === id) {
      persona.edad = edad;
    }
    return persona;
  });
  return getPersona({ id });
};

const root = {
  mensaje: getMensaje,
  persona: getPersona,
  personas: getPersonas,
  actualizarEdad: actualizarEdad
};

// create express server with graphql at /graphql endpoint
const app = express();
const port = 4000;
app.use('/graphql', expressGraphQL({
  schema: schema,
  rootValue: root,
  graphiql: true
}));

app.listen(port, () => console.log(`Servidor graphql corriendo en http://localhost:${port}/graphql`));
执行
要运行我们的服务器,在项目内的控制台中执行以下命令:
$ node index.js导航到 http://localhost:4000/graphql 时,应该会看到以下页面:
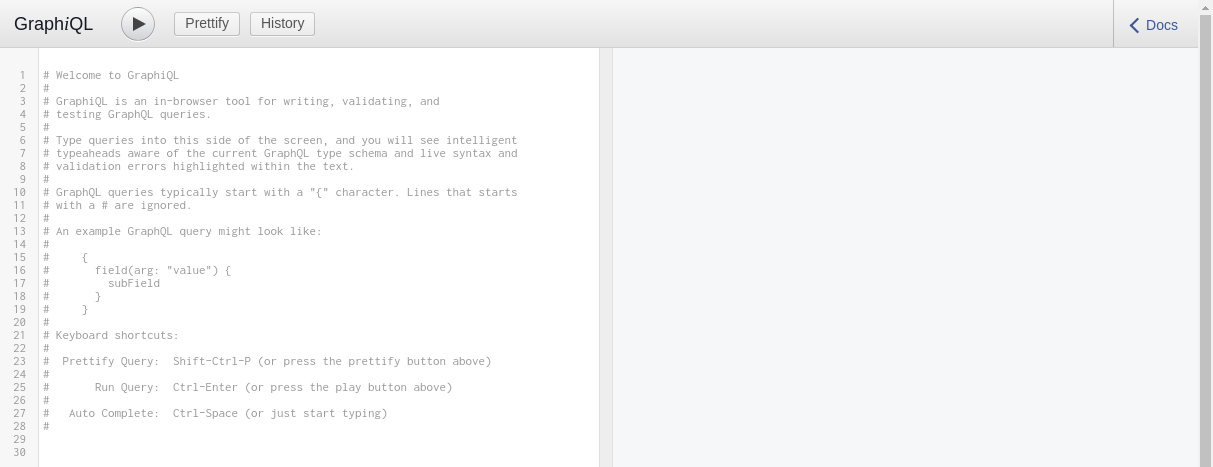
由于我们在创建端点时设置了 graphiql: true,我们可以访问一个图形面板来与我们的 API 交互。
使用 GraphiQL 测试
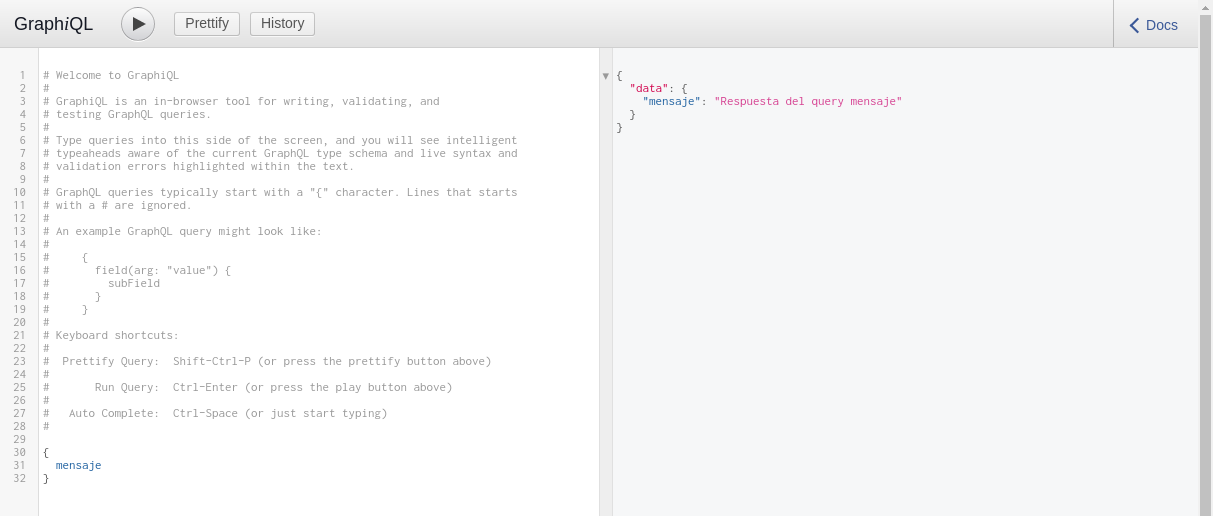
如果我们在右侧输入 { mensaje },API 应显示以下结果:
我们还可以向查询传递参数。例如,我们可以获取具有 id: 1 的 persona,并指定我们想要获取的属性,如下所示:
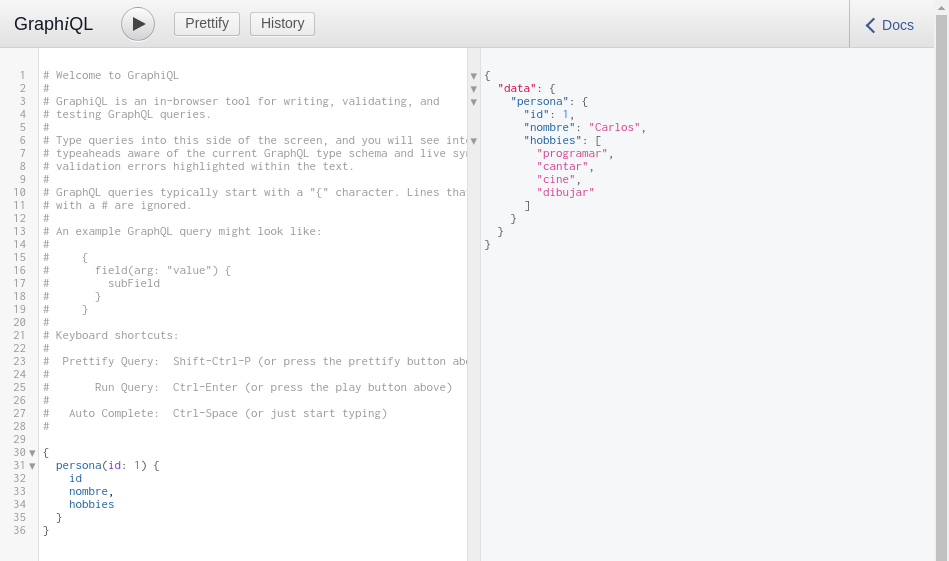
我们看到我们只显示了 id、nombre 和 hobbies 属性。
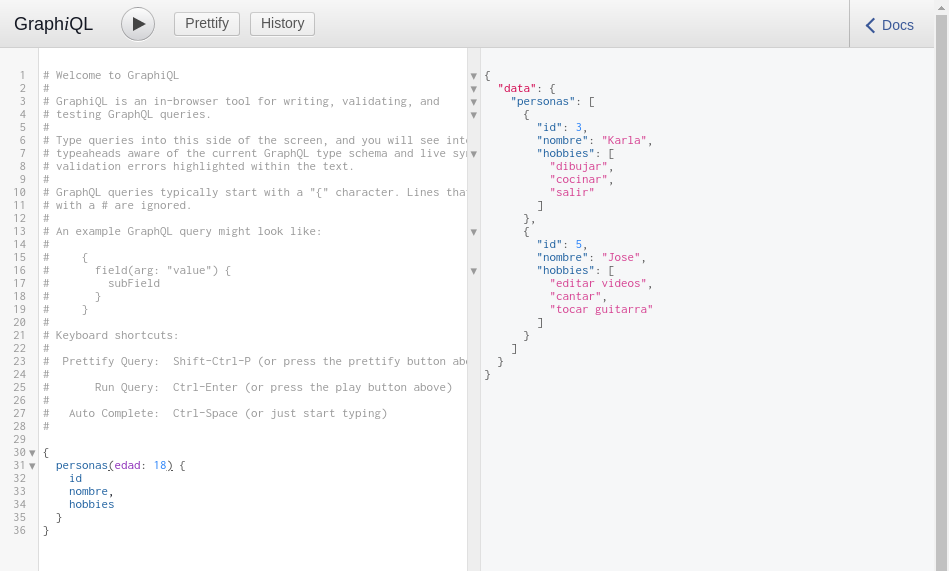
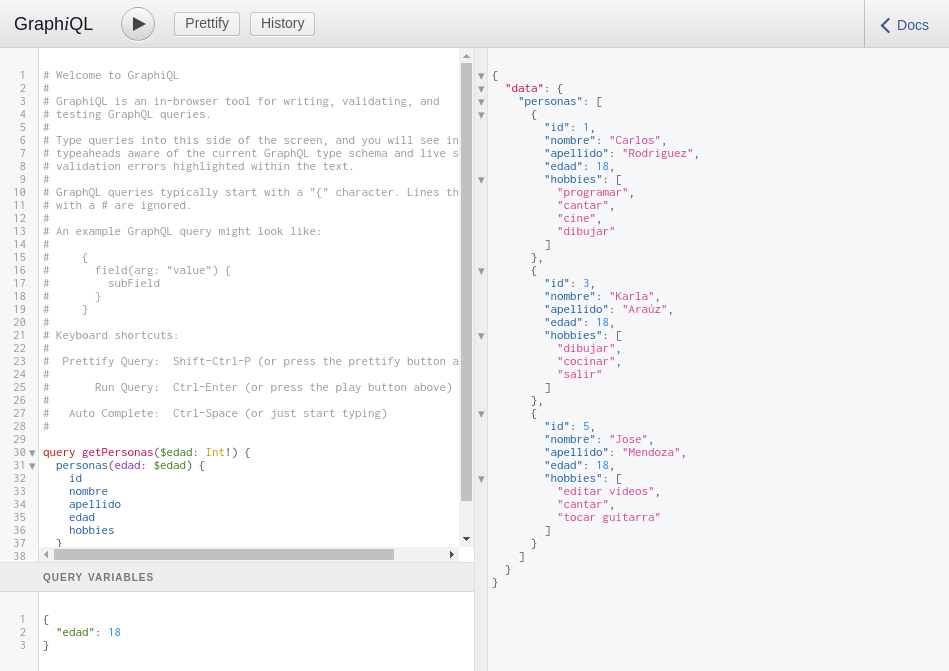
我们还可以使用我们创建的名为 personas 的 Query,它接收一个年龄。
要执行 mutation,我们必须首先将其定义为 mutation。在本例中,我们定义了一个名为 actualizarEdad 的 mutation,并指定它必须具有 Int 类型的 id 和 edad。我们将看到,在执行 mutation 后,我们定义的函数返回一个对象,其中可以看到修改后的年龄信息。
现在让我们通过执行我们创建的 mutation 将 Carlos 的年龄从 21 改为 18:
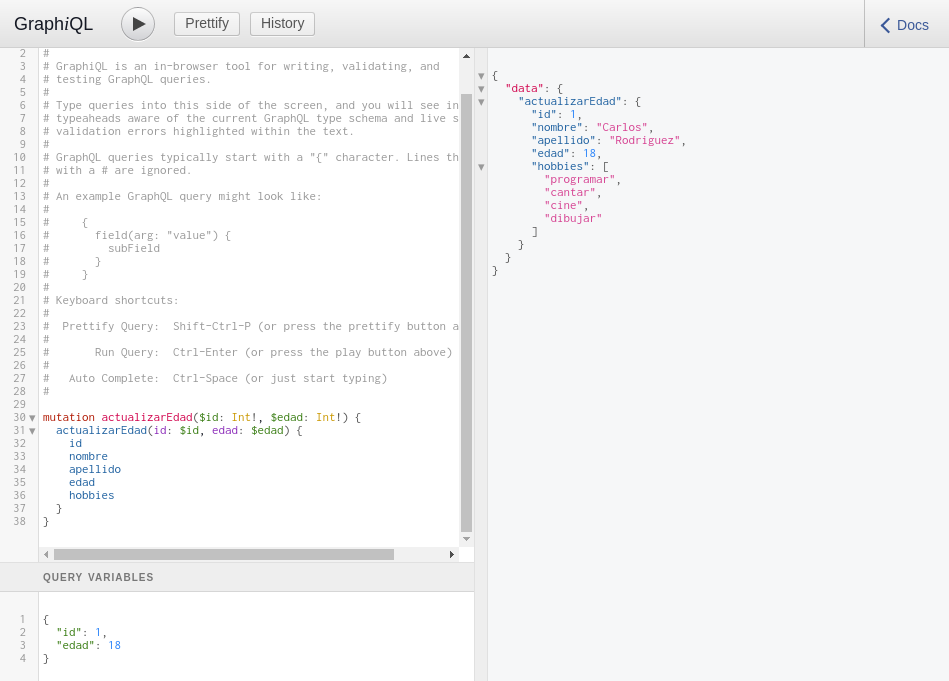
需要注意的是,由于我们定义了一个带有变量 $id 和 $edad 的 mutation,因此需要在底部的 Query Variables 中定义它们。
如果我们再次使用年龄 18 查询 personas 查询,我们将看到现在 Carlos 出现在列表中:
结论
通过这些示例,我们看到 GraphQL 为我们提供了一个图形环境,我们可以在其中测试我们的模式和流程。具体而言,在我们的案例中,我们能够使用各种 GraphQL 概念,例如模式、解析它们的方法以及在 Express 服务器上的配置。
希望本指南对你有帮助。